replaced the original panels in the other speaker with PK refurbed panels.
Family member and fellow Junkie Steve Berger came to help.
and apparently snapped this when he finished.
and finally the results of what was cooking the other night hooked to the PK panels.
Wednesday, July 9, 2014
Saturday, July 5, 2014
Old tyme cooking,
Here is my latest attempt at "dinner and drinks".
Drinks
Dinner
For some reason everyone opted for cheap beer and pizza which amazed me considering the purity of the ingredients of my concoctions.
Hopefully there will be some more discerning geeks at walterfest.
Saturday, June 21, 2014
Friday, June 20, 2014
Chicken or the Egg?
In keeping with the victrola horn theme.
I was always under the impression that the WE 555 came about based on the Victor Credenza. In looking at the patents, the 555 was applied for first and also granted first.
Both patents were done by the same attorney but the 555 was WE and the credenza transducer Bell Labs. The firsty credenza dates back to 1925 so the patent is obviously after the fact
Just attach a needle to a diaphragm and play 78's and do I see a mini 16A hidden inside the box?
I was always under the impression that the WE 555 came about based on the Victor Credenza. In looking at the patents, the 555 was applied for first and also granted first.
Both patents were done by the same attorney but the 555 was WE and the credenza transducer Bell Labs. The firsty credenza dates back to 1925 so the patent is obviously after the fact
I love the above treatment.
Just attach a needle to a diaphragm and play 78's and do I see a mini 16A hidden inside the box?
Tuesday, June 17, 2014
Mystery Horn Identified
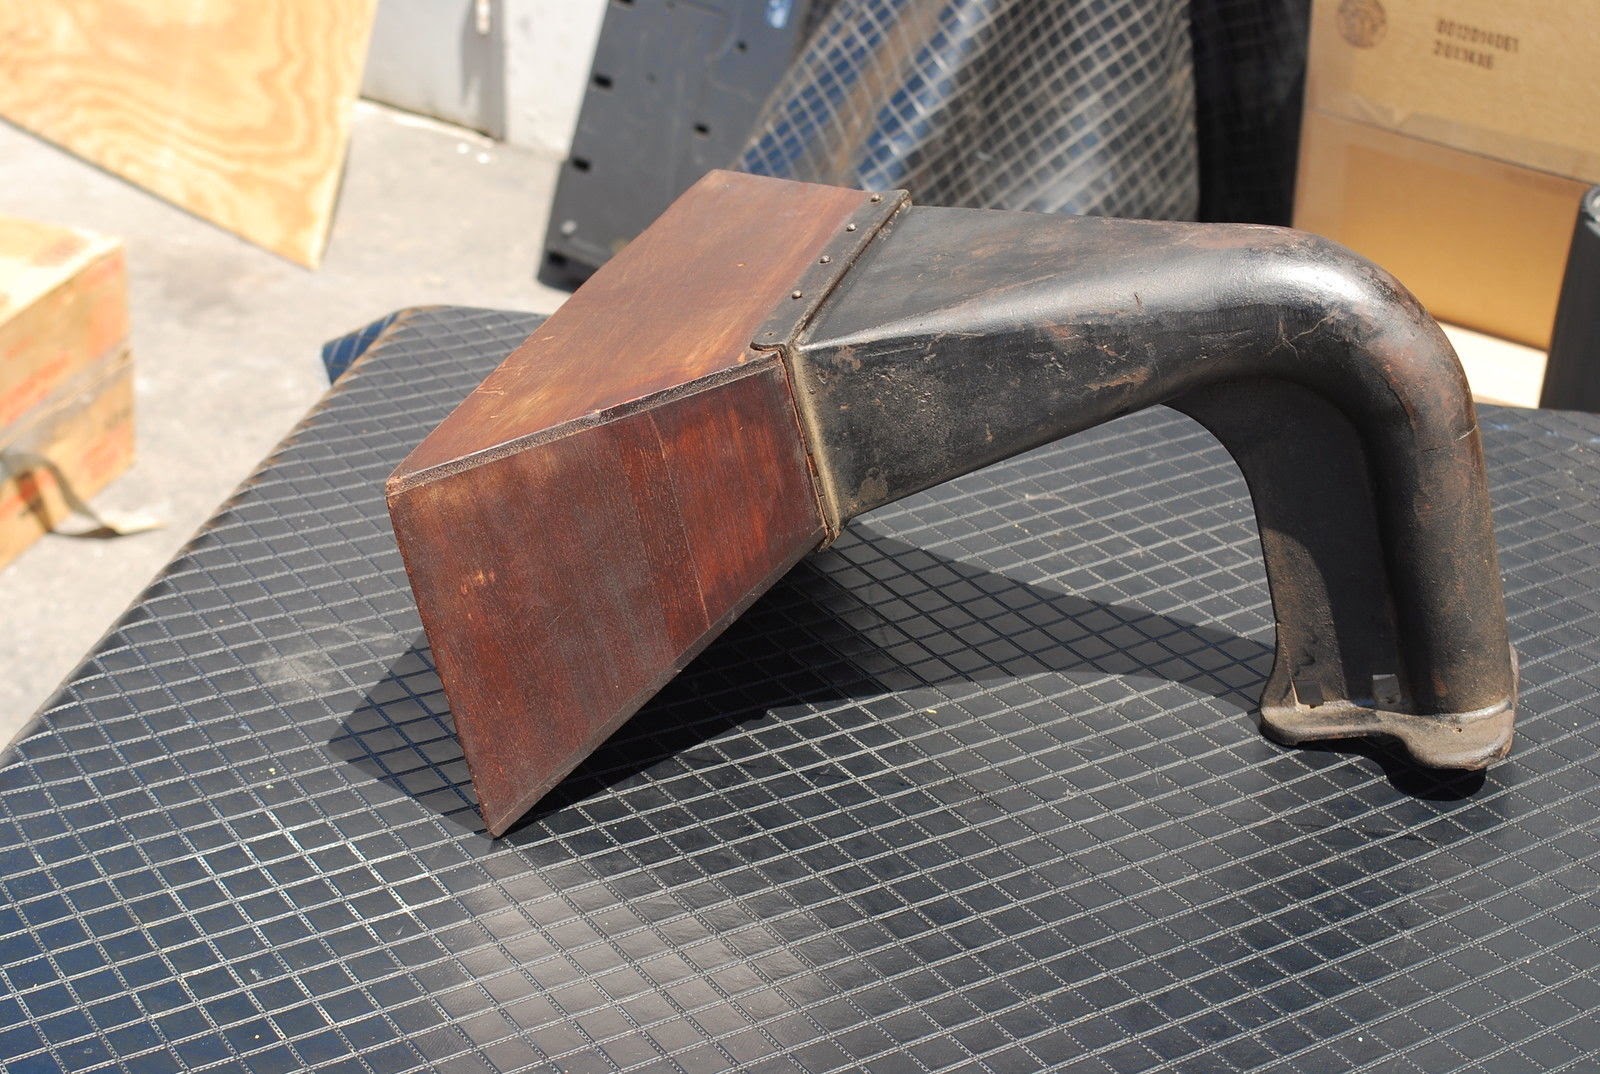
A few posts down I found a horn that I was unsure of its intended use. Walter pointed me to a similar horn and it all came together. I was puzzled by the flat top and back and that the mounting flange didn't form a full circle to couple to the driver.
I now know the reason and I had everything upsidedown, because it wasn't meant to couple to a driver but to the above the surface parts of a victrola.
picture borrowed from lovehateadvertising.com
I have never really paid much attention to victrolas and from afar I just assumed those louvers were shelves to store your78"s
I guess you learn something new every day.
dave
Monday, June 16, 2014
Sunday, June 8, 2014
Flea Market Find.
Found this while scrounging for records today and it was just too pretty to pass up.
The cast (bronze??) throat adapter weighs at least 20 pounds
The only makings
an odd shaped coupling.
Must have mounted flat.
that it an oak horn.
and sounds really good given the source.
The cast (bronze??) throat adapter weighs at least 20 pounds
The only makings
an odd shaped coupling.
Must have mounted flat.
that it an oak horn.
and sounds really good given the source.
Friday, June 6, 2014
Empty Boxes and Blue Tape.
A box came in today which I thought contained 10 batteries for yellow dog's bark collar but when I opened It I was puzzled to see what appeard to be a box of broken styrofoam. Upon a little spelunking I realized the hidden treasure. (forgotten purchase)
after peeling off the masking tape... yes masking tape not packing tape! I saw my favorite packing aid... the blue tape.
unlike packing tape...both the masking and blue tape easily peel off and the cartridge in need of a makeover is safe.... can't wait to take a dremel to it.
In contrast to this experience I just received an order from Mouser that had all of the panasonic TSHA caps in pairs and rolled in bubble wrap. In order to secure the bubble every exposed surface of the bubble wrap was then secured with packing tape. I used a band saw to open them. Here is a good lesson. Take a prized tube and wrap it in bubble wrap and then completely cover the bubble with packing tape. Now attempt to open it. If everything went fine, repeat with 10 tubes. Eventually a tube or a finger is going to take one for the team.
If you must use packing tape to secure bubble wrap, use one small piece and fold an edge of the tape over to provide an obvious access point.
Thank you for reading this installment of Ghetto Packing & Shipping 101.
dave
Friday, May 30, 2014
selfie for scale
I know things have been slow here so I am stirring up the bottom of the barrel for some content.
This is a new first order "Proof of Concept" idea that showed up the other day. It is in the early stages and might be a total flop but people have been badgering us for this solution for years.
dave
If it fails, this is all the world will see of it. In our typical fashion, we are approaching the concept from square one and cautiously moving on from there trying to learn.
dave
Wednesday, May 28, 2014
Monday, May 19, 2014
Sunday, May 11, 2014
Thursday, May 8, 2014
Hong Kong DIY
I first met Ngan when he became interested in Stephie's LR phono and that was close to 10 years ago. Since then we have become friends and he is one of the guys that is willing to try everything... that is not a typo... he does try everything.
I can't wait to see how it looks in 10 years when all the brass patinias up.
dave
He sent me these pics of his latest build which aside from the filament and power transformers use all nickel transformers. As I recall filtering is a nickel choke input filter with a second nickel smoothing choke. The driver is an 841 loaded with a nickel plate choke feeding a 50/300B with 5K nickel outputs.
I can't wait to see how it looks in 10 years when all the brass patinias up.
dave
Thursday, April 17, 2014
What The Vari-Load Batman.
What are all of those secondary wires coming out of that amorphous GM-70 output for??
I have made it well known over the years that I don't do multiple secondaries or taps because I feel they compromise the overall design. Well I guess I need to change that particular stance and I would like to introduce you all to the Vari-Load concept.
By adding a second strategicly places winding on the secondary I am able to get three different turns ratios which all have essentially the same frequency characteristics. When you work the speaker impedance back to the load you get a number of options to play with. Below is a screen grab of the spreadsheet showing how the numbers work out.
The three possible connections are:
Secondary 1 alone (Sec 2 remains floating)
Sec 1 in series with Sec 2 adding
Sec 1 in series with Sec 2 subtracting
since secondary two has a small number of turns and is never referenced to ground, it doesn't introduce the capacitive issues that plague other transformers causing varied response as you adjust the impedance.
To make things even worse (and I assure you i did not draft this on 1, April.... take a gander at this.
Sure it is a box.... Big deal... but the next three pictures may terrorize some of you.
75TL thrown in for size
By adding a second strategicly places winding on the secondary I am able to get three different turns ratios which all have essentially the same frequency characteristics. When you work the speaker impedance back to the load you get a number of options to play with. Below is a screen grab of the spreadsheet showing how the numbers work out.
The three possible connections are:
Secondary 1 alone (Sec 2 remains floating)
Sec 1 in series with Sec 2 adding
Sec 1 in series with Sec 2 subtracting
since secondary two has a small number of turns and is never referenced to ground, it doesn't introduce the capacitive issues that plague other transformers causing varied response as you adjust the impedance.
To make things even worse (and I assure you i did not draft this on 1, April.... take a gander at this.
Sunday, March 30, 2014
Getting Loaded
Hey all...
I finally came up with a way to make custom copper wound load resistors for loading MC cartridges.
The values are best to be kept below 1K (hey we only load the cartridge directly right!) which should cover most cases.
and a peek under the black shrink. I have some clear shrink on the way to see if the peekaboo look works.
As for the measured parameters.... They are wound in a non-inductive fashion and here is the impedance plot from 10hz-100Khz of a 190 ohm unit.
Are they perfect? Hell no! Am I going to lose any sleep over their imperfections? No way... I'll just put some BS marketing spin on them like 5% tolerance throughout the entire audio spectrum... or maybe just let the audio jackals have at me for this silly idea.
dave
I finally came up with a way to make custom copper wound load resistors for loading MC cartridges.
The values are best to be kept below 1K (hey we only load the cartridge directly right!) which should cover most cases.
Above is a 120 ohm and a190 ohm to load a Zu 103R feeding a 1:20 silver SUT.
and a peek under the black shrink. I have some clear shrink on the way to see if the peekaboo look works.
As for the measured parameters.... They are wound in a non-inductive fashion and here is the impedance plot from 10hz-100Khz of a 190 ohm unit.
Are they perfect? Hell no! Am I going to lose any sleep over their imperfections? No way... I'll just put some BS marketing spin on them like 5% tolerance throughout the entire audio spectrum... or maybe just let the audio jackals have at me for this silly idea.
dave
Wednesday, March 26, 2014
Learning...
.
learning a new place... learning to work metal...
learning to work alongside new friends....
and learning is a goal of life, so....
messing with an amp idea...
not sure what that was about, but...
you know I cannot deal with fresh brass... gotta get that patina...
and this is learning patience... I *so* want to drag this car out and get it running...
peace,
me
Subscribe to:
Posts (Atom)